Learn how to sew a lovely, no-zipper skirt in this step by step tutorial.

This No- Zipper Skirt is beautiful and simple to make. It took me three days to sew but only because my baby is going through a “no nap” phase. There were a lot of little feet on my fabric and loud tumbling and laughing all around.

Watch the video!
Just a little disclaimer, I’m not a seamstress. I took a couple of sewing classes for fun in college but I mostly learned by doing things and looking things up.
I also have an amazing mom who sewed a lot when I was growing up. She sewed costumes for every musical and play I was in from 4th grade through my senior year. She made her own wedding dress, my wedding dress, and two of my sister’s.

I get impatient and like to cut corners. I’m not trying for perfection, just good, pretty or useful.
I love hearing other people’s tips and tricks. Let me know in the comments what you like to do 🙂


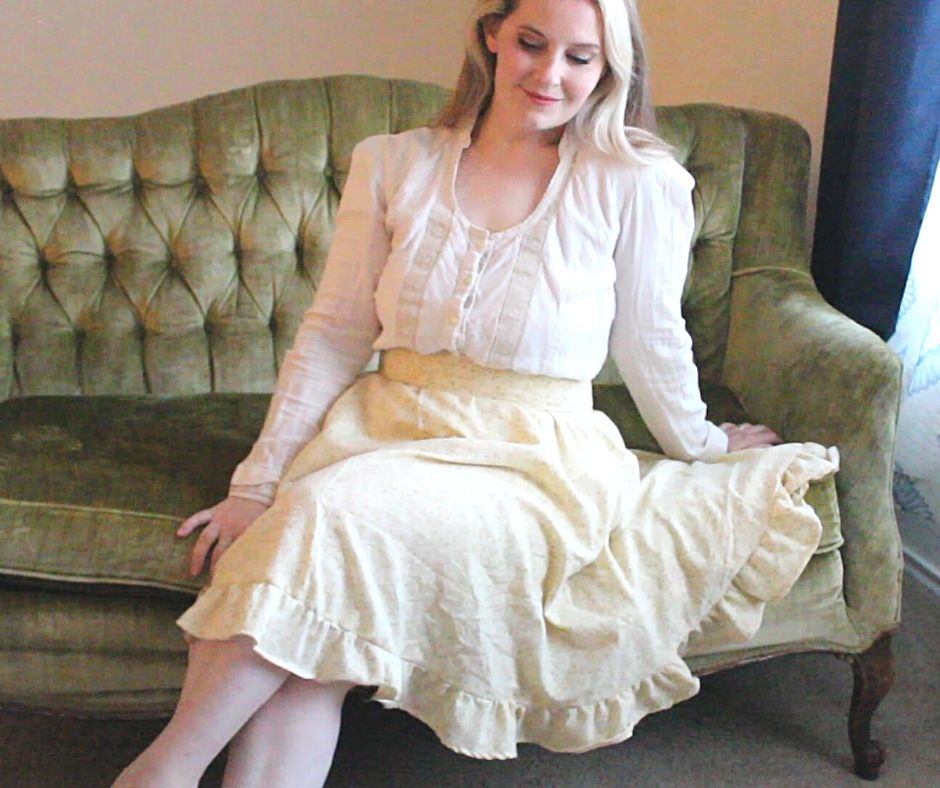
A No-Zipper Circle Skirt
This is a simple skirt to make. There are a lot of instructions and pictures because I really wanted to hold your hand through the whole process. Once you’ve made one, you can make more and customize it for different looks. Make it longer, shorter, more ruffles, no ruffle, add pockets. There are so many possibilities. It’s a fun project!
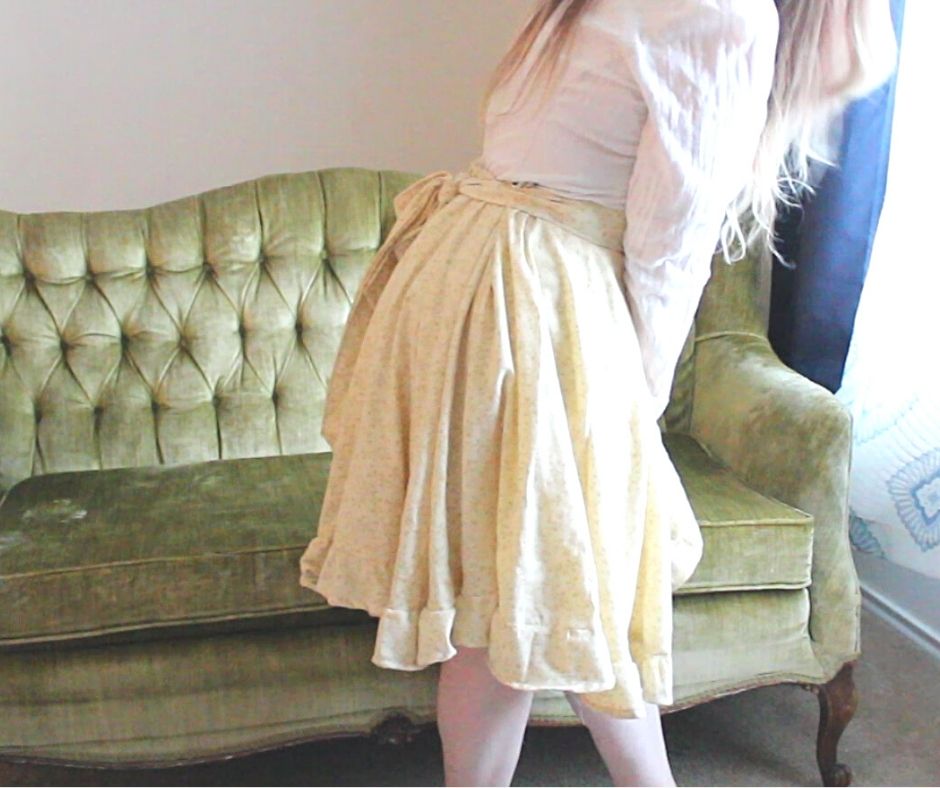
This is a no-zipper circle skirt with a waist band, tie, and a ruffle at the bottom. I like the wide waist band because it gives more structure to a pretty flowy skirt. The tie is nice because you can cinch it up or leave it looser depending on how you’re feeling. You can tie it in the back or bring it all the way to the front and change the look a little. The tie also covers the gathers from the elastic.
I decided to make this a no-zipper skirt because zippers intimidate the heck out of me and they take too long. I can’t sew straight lines to save my life. So, I try to sew things that are more forgiving and zippers tend to come out pretty wonky.
We’ll be taking shortcuts and utilizing my good friend “Mr. Elastic” for this No-Zipper Skirt. He’s gonna be your friend if you’ve got a waist line with a mind of its own.

Disclosure: I only recommend products I would use myself and all opinions expressed here are my own. This post contains affiliate links, which means I make a small commission at no extra cost to you. As an Amazon Associate I earn from qualifying purchases.
What Fabric to Use
For this No-Zipper Skirt you want something light and flowy. Cotton or linen work really well. If you use a thicker, stiffer fabric you’ll end up with more of a 50’s poodle skirt. Still cool but another project entirely.
I’ve had my eye out for some vintage cotton fabric at thrift stores and garage sales because I wanted something that was softer and flowy-er than the typical stuff you find at the fabric store.
I found a couple of used, but in great condition, vintage bed sets at the flea market on my birthday for only $3 dollars each! Are you kidding me?! Each set has two pillow cases, a nice blanket, a flat sheet and a fitted sheet. One full and one twin set. Happy Birthday to me!

I love the neutral print and because it’s used, the fabric is really light and soft. But no stains anywhere. I’ve got a lot of material to work with so you’ll probably see some more tutorials with this fabric in the future 🙂
Materials for a No-Zipper Skirt
Sewing machine – Here is an inexpensive sewing machine I found that’s similar to mine. I bought a cheap Brother sewing machine 15 years ago and it’s still going. I used to sew on a card table and it would bounce around if I went too fast 🙂 Now I mostly sew on the floor. I’m moving up in the world😂.
2 inch wide elastic – this is the width of your waistband so go with whatever size you want that to be.
Thread – here is some black and white thread but you could probably find it cheaper in person at the store.
Scissors – I did buy these and they are nice and sharp.
fabric – Here’s a link for a pretty rose-patterned sheet set. 2 1/2 yards of light fabric or a flat sheet that’s at least twin size. I used the full-size flat sheet and I had plenty left over. Just make sure to wash the fabric first. This allows the fabric to shrink however it’s going to before you measure it and sew it.
Tape measure – here’s a cute pink one.
Marking tool -pencil, marker, pen, or chalk. Anything you’ve got lying around works. Just don’t use anything that will bleed into the fabric a lot.
Pins – I like large-headed, colorful pins so it’s less likely they’ll disappear into the carpet.
Measurements
In order to make a circle skirt you need to take a few measurements of yourself. Normally with a circle skirt you measure your waist.
Since this is a No-Zipper Skirt, I’m measuring the widest part of me which are my baby-birthing hips. I want it to be able to fit over with elastic so it’s got to stretch out to at least that wide. Mine measured to 41 inches.

You’re going to be folding your fabric in order to cut out a circle. To get the correct measure measurement for the opening you need to do a tiny bit of math. Don’t worry. it’s not hard.
Take your hip measurement and divide it by 3.14
My hip measurement is 41 so I did this: 41 divided by 3.14 = about 13.057
Now divide that by 2. So mine is 13.057 divided by 2 = 6.5
6.5 inches is how far I will be measuring from the corner after I fold my fabric. It’ll make more sense in a minute.
Also, measure how long you want the skirt to be. Measure from your waist down to your knee if you want it to look like mine. The ruffle will add a couple inches but the waist band will not because it sits on the skirt. The ruffle hangs off the bottom. Mine is 20 inches long.

Lay Out the Fabric
Wash and dry your fabric before you get started. If you’re making something you intend to wash and dry after it’s done, like clothes, then you want to do this before. Most fabric will shrink in some way when it’s washed. This is on of the reasons I like to use second-hand bedsheets. They’ve already done all the shrinking they’re ever going to do and they’re usually softer and cheaper than brand new sheets.
Fold your fabric into fourths so you have a square with four layers.
Looking at the 4 corners of your square, find the corner that doesn’t have any open edges. Lay your measuring tape on the point of that corner and measure out the the number you got for your hips after you divided twice. So I’m measuring out 6.5 in a half circle. Marking every few inches.

You could even put a pin right in the corner straight down into the carpet like a nail, holding your tape measure to the fabric.
Then connect the marks to form a curved line.
Next, use that curved line you just drew and measure out the length you would like your skirt to be. I’m measuring out 20 inches.

Follow the line around and keep the measuring tape straight. Make marks every few inches again.

Connect the marks again to form a larger curved line. Now you have the body of the skirt drawn out.

For the ruffle, measure four inches down from the skirt in the same way. Marking all the way across and connecting the marks. Do this twice for the ruffle. So you have two sections of ruffle.
Let’s Cut the No-Zipper Skirt
Now cut out along all of the lines. You can place some pins if you feel like the fabric is going to slide around while you’re cutting. Leave it folded so you can cut out the waist band.

In the picture above you can see I made the mistake of only marking one section for the ruffle. But the rule of thumb for ruffles is to cut out at least 1 and a half times the length of the piece you are sewing it to. So you’ll have extra by cutting out two rows, unless you want it really frilly.

I had to fold it up again and mark out the second section of ruffle when I realized my mistake.
Now let’s cut out the waist band and ties.
At the bottom of the fabric, make sure the edges are all lined up so you can get a straight cut. I am using the wide elastic to give the front and side of my waist band some more structure. Since it is 2 inches wide, I measure out 4 and a 1/2 inches at the bottom and then made a small cut. Then I ripped the fabric down the whole length.

This was only sort of successful. I folded it in half to make sure it was even all across and it wasn’t so I trimmed it to be the same width with my scissors. Good thing I gave myself an extra inch to play with. I recommend just measuring down the whole length and marking like you did with the body of the skirt and ruffles.
Start Sewing Your No-Zipper Skirt
Hem the top edge of your skirt. This is the waist opening. Just roll it over twice and sew it flat.

Set aside the skirt body and grab your wide elastic, pins, scissors, and waist band fabric you cut out.
Hold the wide elastic up to your waist and cut a length that goes from one side to the other.

Now fold that in half and put a pin in the middle.
Fold your fabric waist band in half and put a pin in the middle also.

Now match the two pins up.
Fold the edge over the elastic and pin all down the length.

Make sure to pin it down past the elastic on either side too. You are essentially hemming the tie and encasing the elastic. Iron it if you have trouble keeping it in place.
Sew down the whole side.
Fold the other side in and iron it down. You can see that I folded it in a lot more than the top. This is because I wanted it to meet the top edge when I brought it up to wrap over the elastic.

Bring the bottom up and lay it on top of the elastic and sewn part. You can iron and pin this all the ay down as well.

Turn this over and sew over the line you already sewed at the top. This is called “stitching in the ditch”. This way you only have one sewn line.

Sew the other side al the way down the length so you have two lines of stitching on the waist band.
To finish the ends, take one end, fold over the raw edge then fold it over on itself to make a triangle. Sew down the side of the triangle and across it.


Check to make sure you are folding the other end the right direction so they match.
Your waist band and ties are done. Now let’s sew it to the skirt!
Sewing On the Band for Your No-Zipper Skirt

Lay out your skirt right side out and slip something flat and hard between the waistline layers. I just used one of my kids’ books. Now lay the waist band you just finished onto the top edge and pin it.

Make sure you put the open seam of the band downward.
Only sew across the part of the waist band that has the wide elastic. DON’T sew it all the way around the top of the skirt. You won’t be able to fit into your skirt and you’ll have to do a zipper. No one wants that.
Now pin the bottom of the band down to the skirt, making sure to keep it as straight as possible. You’ll be sewing over some gathers in the fabric.


When you’re done you should have a skirt you can try on that has a rather breezy backend.

To bring the back part of the skirt in to fit you waist, you need to sew on some more elastic. Take the 1/4 inch elastic and measure how much you need to stretch around your back.
Really stretch it as you measure so you’ll get a snug fit on the skirt. Mine was about 6 inches long.
Pin your ties to the waist band so they’re out of the way. Turn your skirt inside out.
Just like you did for the waistband, find the middle of your elastic piece and mark it with a pin. Find the middle of the back portion of the waist band and mark it with a pin.

Match the pins together and pin them. Pin the elastic about 2 inches down from the top. I sewed my elastic right to the top and it came out weird looking.


Now take one side of the elastic and pin it to the waist the just where it meets the tie. Do the same for the other end of the elastic. Be careful not to pin it to the tie.
It won’t match in size. The elastic will look too small. When you stretch the elastic it should match the length of the fabric it’s pinned to.

Set Your Stitch
If you have a digital machine, and most machines are these days, your machine has a default stitch setting it goes to when you turn it on. This is the regular running stitch. This is perfect for most sewing. You don’t have to do anything.

When you are sewing stretchy fabric, you have to change it because you need a stitch that will stretch with the fabric and not break. We didn’t change the stitch setting when we sewed the waist band because we were only using the wide elastic for more stability and structure in the band.
Now it’s time to sew the elastic in the back. This needs to be able to stretch so you can get those hips or shoulders into the skirt.
So, we need to change the stitch setting to the zigzag stitch.

You can see there are actually several zigzag stitches my machine can do. I like to use number 4 because I don’t have to change the presser foot. If you look at the closeup picture of the screen on my machine, you can see a little side profile picture of a presser foot with the letter J. This is the standard, regular foot your machine will have on it. Some of the other stitches will require you to remove that and switch it for another letter foot. This is because the needle will be moving in a different pattern and the J presser foot shape will get in the way, likely breaking the needle.
My machine lets me use J all the way through stitch 4. So, I use 4 to save time and it works perfectly. I press the plus sign under the number 1 until it gets to 4. The machine will change the settings automatically to get a zigzag stitch. When you’re finished using the stitch, you can just turn your machine on and off and it will reset back to the regular stitch.
If you have a different kind of machine, you can ask me a question in the comments or email me a picture and I can try and help you figure out how to set it to the zig zag stitch 🙂
Sewing the Elastic on Your No-Zipper Skirt
Now that you’re got your elastic pinned and your machine set to the zigzag stitch, you’re ready to sew the elastic. You’re going to be stretching the elastic as you sew. You need to pull it so it’s the length of the fabric it is laying on top of.
Sew a few stitches to tack down the edge of the elastic. Then, while you are sewing, I recommend you keep one hand in front, holding the middle pin, and one hand behind your machine holding the first pin. And stretch as you feed it through the needle. If you only pull from the front, it puts a lot of pressure on the needle to hold onto the elastic and it could bend your needle and probably break it.


Sew slowly so you can keep the elastic tight and stay on the elastic. Remember to sew it about 2 inches below the edge of the fabric. I sewed my right up to the edge and you could see the elastic. You want it to be bunched and gathered in the back.
I used a matching color so it’s hard to see the zigzags in the picture what is looks like. Here is a picture from another post about a lacy skirt extender.

When you’re done sewing, try it on to make sure it’s tight enough.
If you find it is too loose, You can cut a shorter length of elastic and attach just under the first piece, using the same method as before.

You can also sew across the elastic in a perpendicular line to cinch in some of the waist.

Ruffle
Now that you’ve got in fit the way you like, let’s tackle the final section. The Ruffle.
Take one of your ruffle sections. fold it in half. Cut that in half. You only need one of those so put the other away. Now grab your whole ruffle piece and your half ruffle piece and pin the short side together, right sides together. Sew that and you’ve got one long ruffle piece now.
We need to gather the ruffle piece so it will fit on the bottom of the skirt.
You can either use a needle and sew long stitches by hand or do it on your machine.
Sewing a very long stitch that is only there temporarily is called a basting stitch. It is often used in place of pinning things because it’s secure and easily removed.
To set your machine to a basting stitch, look at your screen and find the number that has a little picture of a running stitch. That number tells you how long the stitches are. Mine is in the top right corner. You want to set that number as high as it will go. My goes up to 5. I don’t press any of the other buttons.

Sew the top edge of your ruffle piece all the way across. DO NOT back stitch at the beginning or the end. We need the thread to slide freely.

To gather the ruffle, pull on one of the strings coming from the end. Slide the material a little at a time until it gathered enough to fit the edge of the skirt.


Pin it to the bottom of the skirt right sides together. This means you will have your skirt right side out but the ruffle will be inside out and upside down against the skirt. It sound crazier that it is. This way when the ruffle flips down it will be right side out also.
Before you sew the ruffle, match the ends of the ruffle right sides together and sew a line to connect them. Then pin in down to match the gathered look of the rest.

Now sew the ruffle to the skirt. Make sure you don’t catch any of the rest of the skirt under the needle on accident!

The last step is to hem the bottom of the skirt. I did it the same way I hemmed the top. Just rolled it under twice to form a very small hem. It can be a little tricky but you can do it! If it’s really giving you trouble, you can cut out tiny triangles that point toward the top of the skirt and then roll the hem. This takes out some of the extra fabric.

Trim any threads hanging off and you’re done!!
Great job sewing your No-Zipper Skirt!

Final Tips for a No-Zipper Skirt
If you want this No-Zipper Skirt to be a little more durable, you can zigzag stitch all of the exposed or “raw” edges inside the skirt. This will keep it from fraying. If you have a serger, even better!
I recommend wearing a pair of shorts under this skirt because any breeze will have you flashing everyone . I love how flowy and light and magical it feels. But a pair of shorts gives me some piece of mind.
Don’t forget to pin it!

Check out some of my other posts!


Thanks for stopping by!
I love this pattern! What a great way to make a cute and size-forgiving skirt 🙂